Adding Testimoni.es widgets to Shopify is very easy and done in two steps:
Step 1: Global tracking code
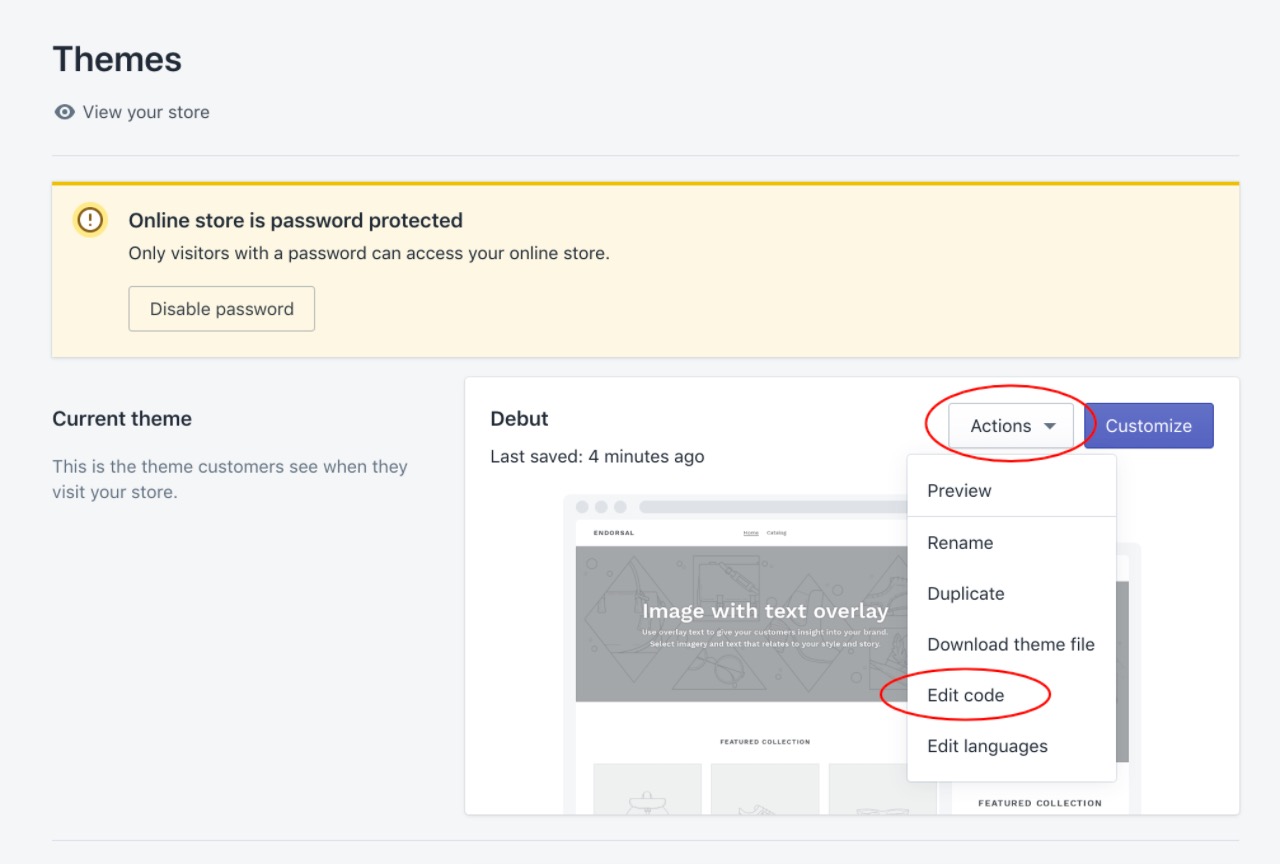
On your Shopify dashboard, head down to "Themes" on the left menu. When there, find your current theme, click the "Actions" dropdown and select "Edit code":
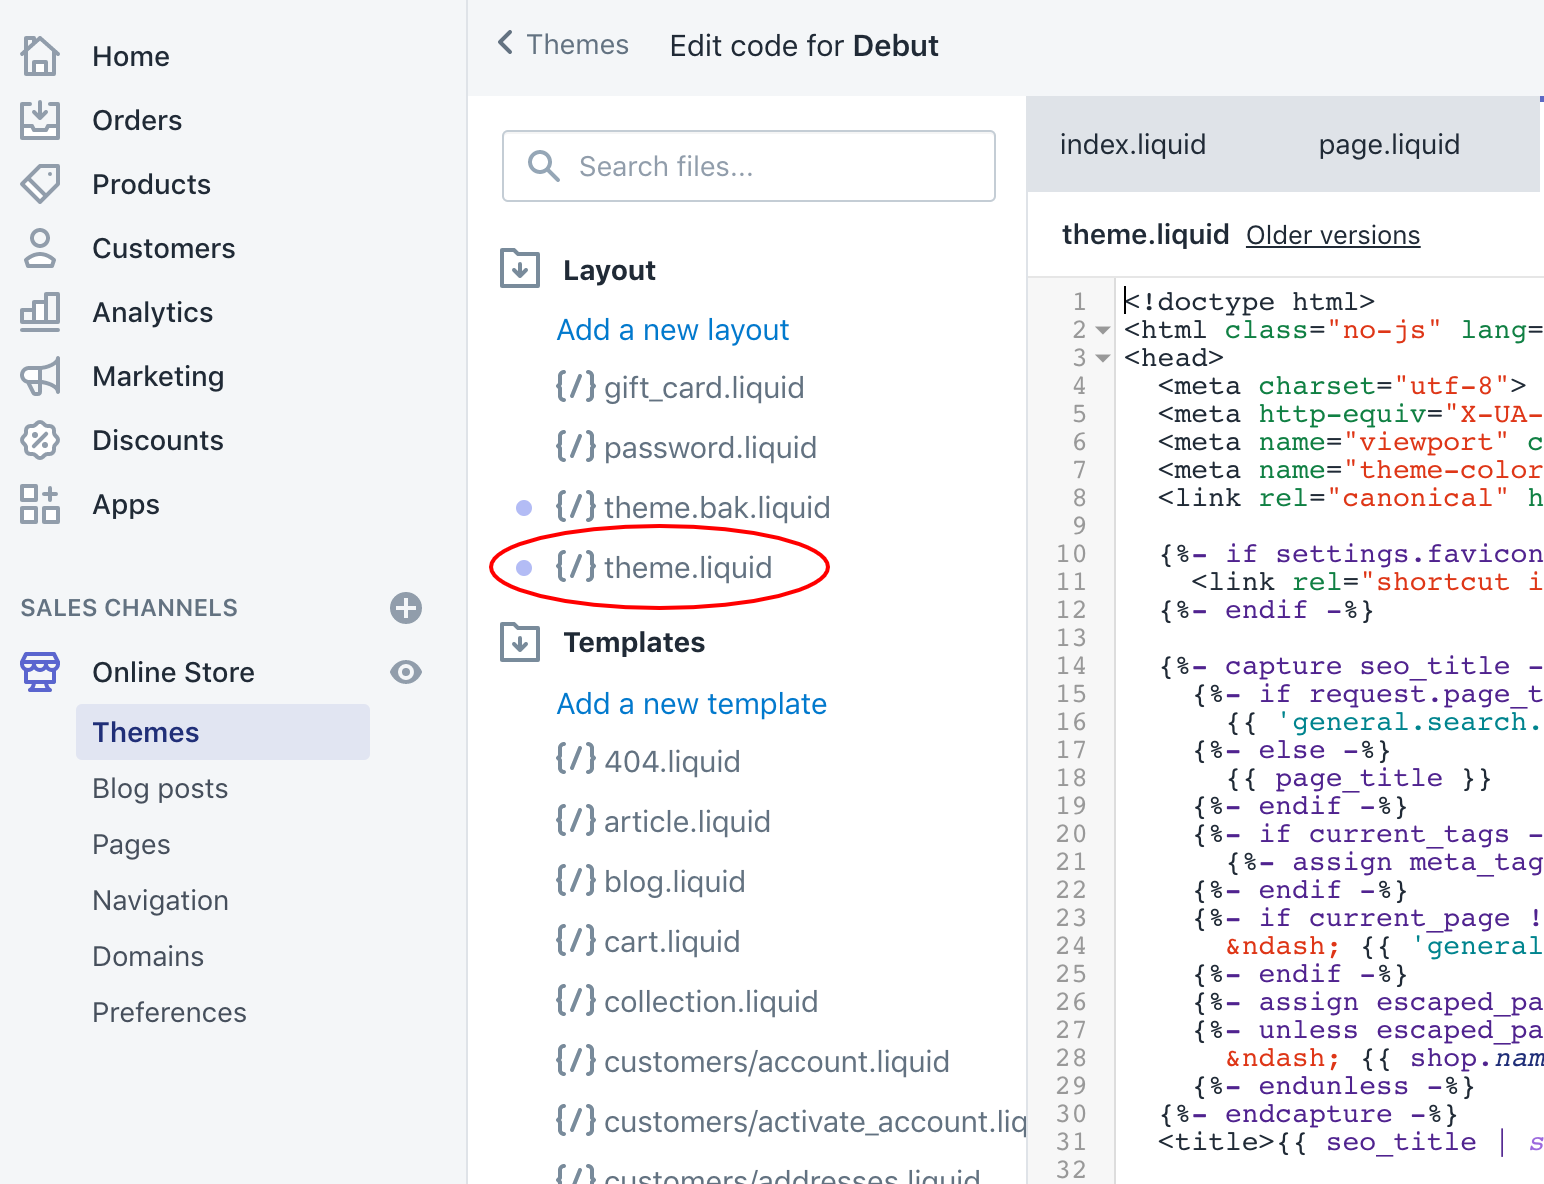
Locate the "theme.liquid" file from the left menu:
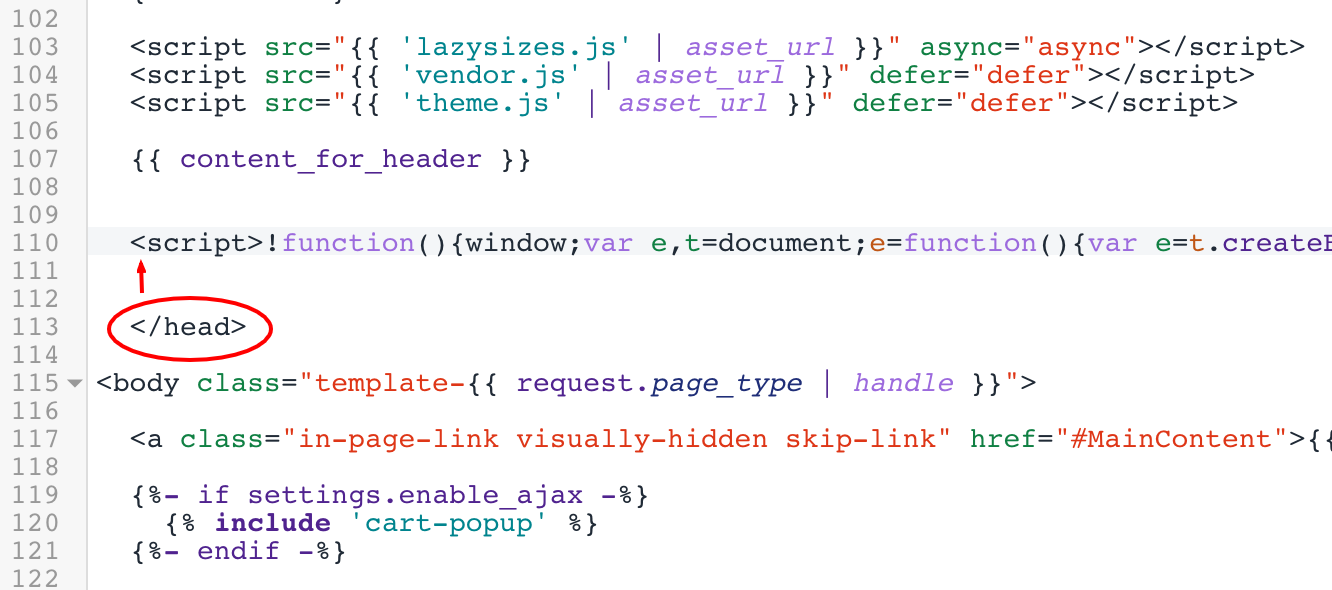
Paste your global tracking code before the closing </head> tag:
If you save changes and refresh your site, you should see the tracking code is active on Testimoni.es.
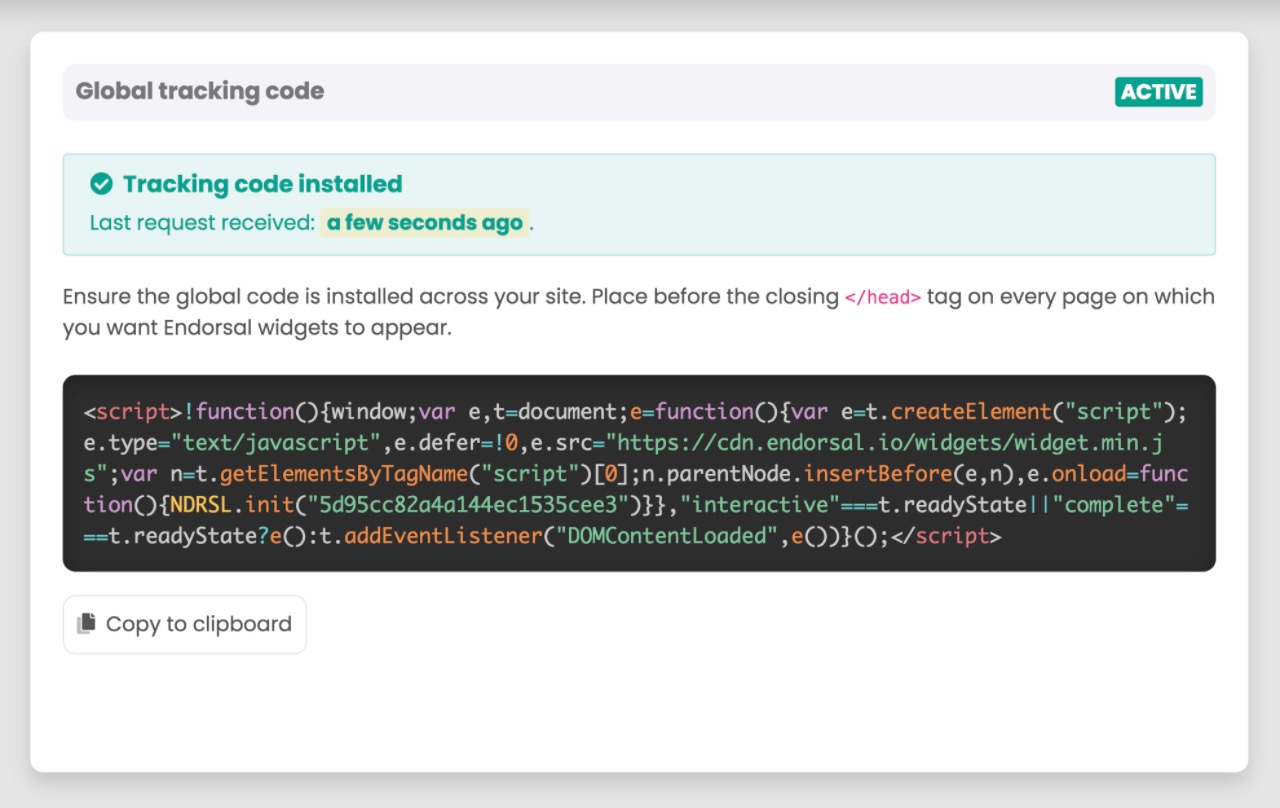
Once this this happens, FOMO popups will automatically display, as long as they are switched on and you have approved testimonials.
If you want to embed testimonial widgets or Walls of Love, you also need to do step 2:
Step 2: Add the widget code
Find the code on the widget's embed page, which will look like this:
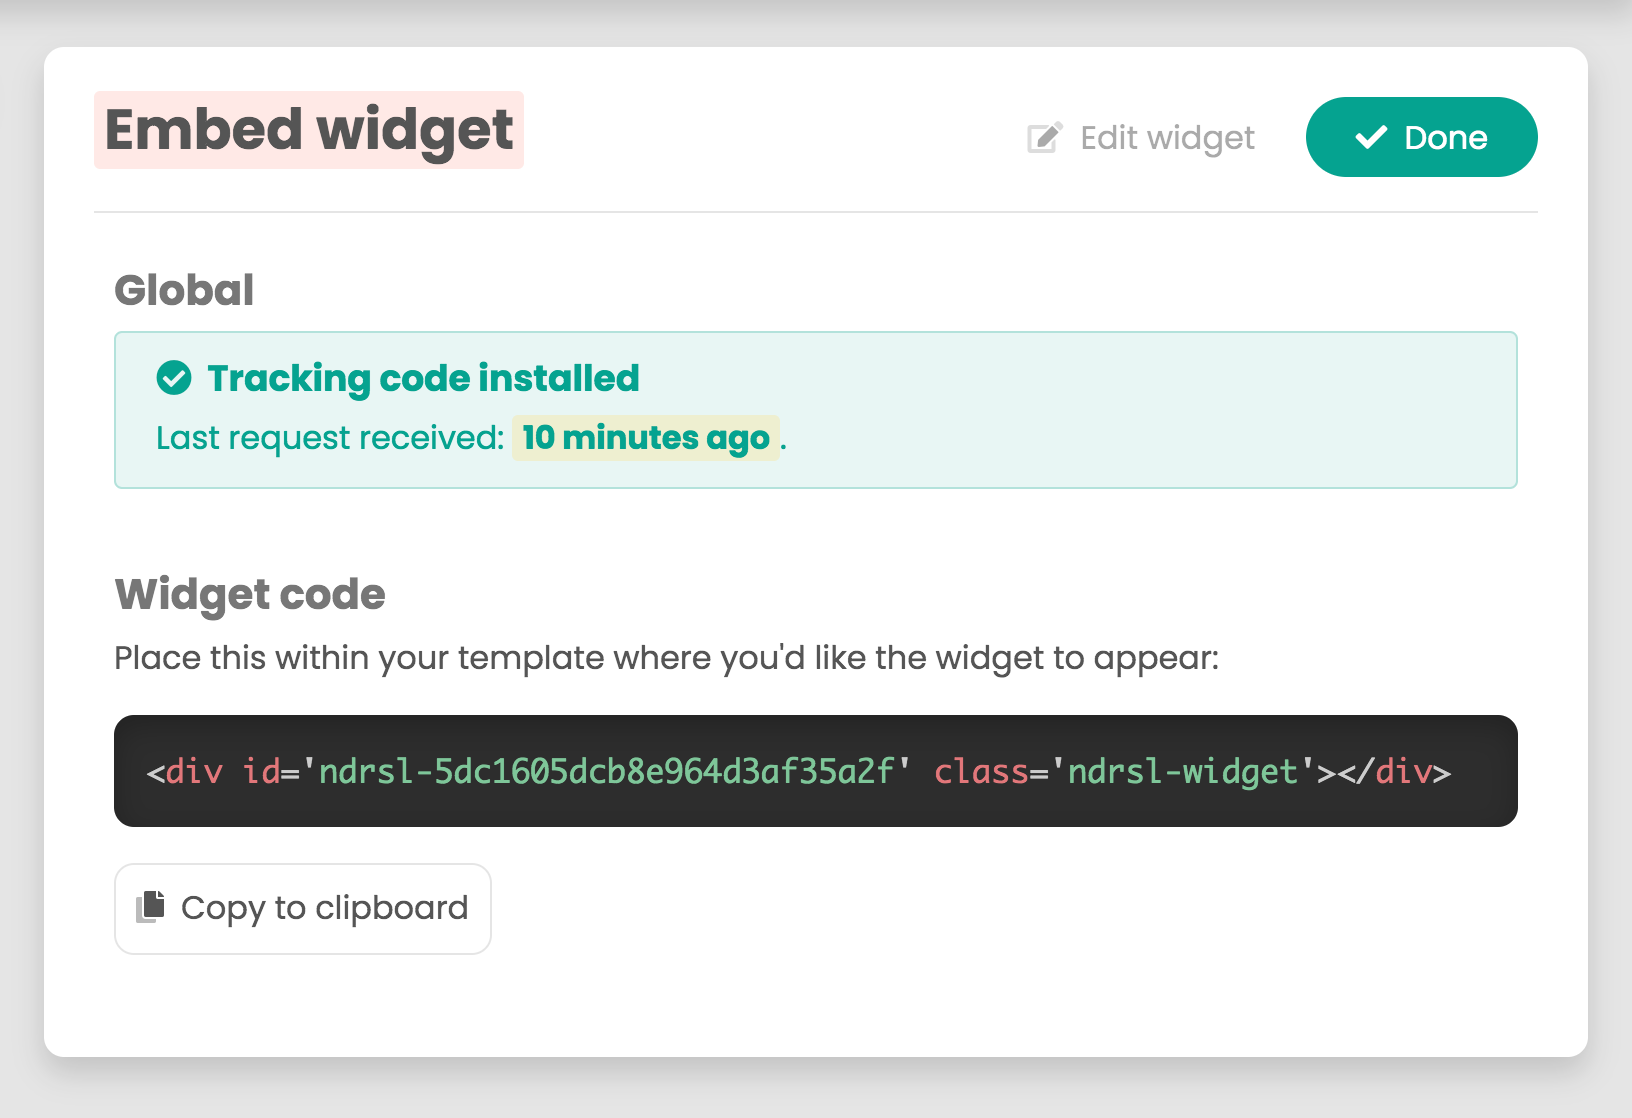
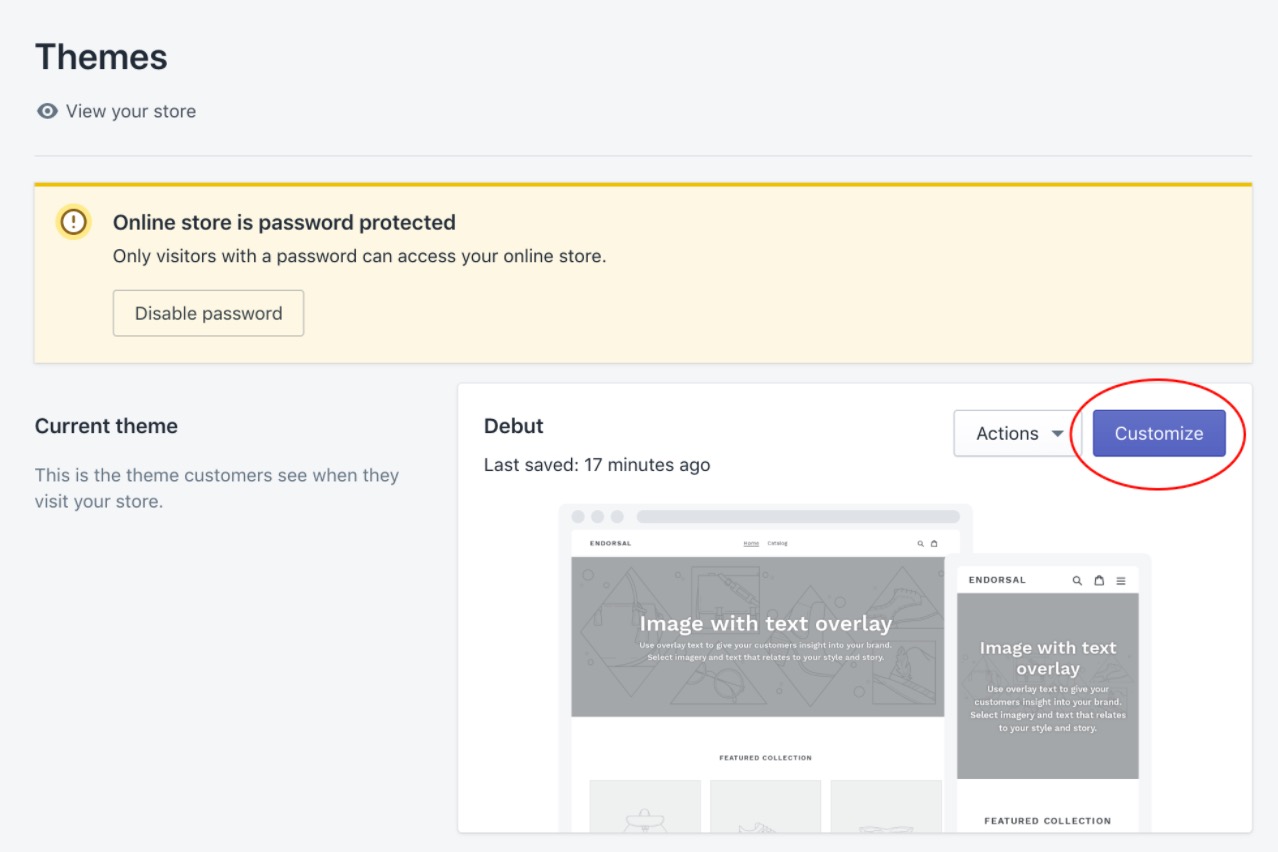
Copy that code and head back to Shopify. Go back to the "Themes" page and click on "Customize":
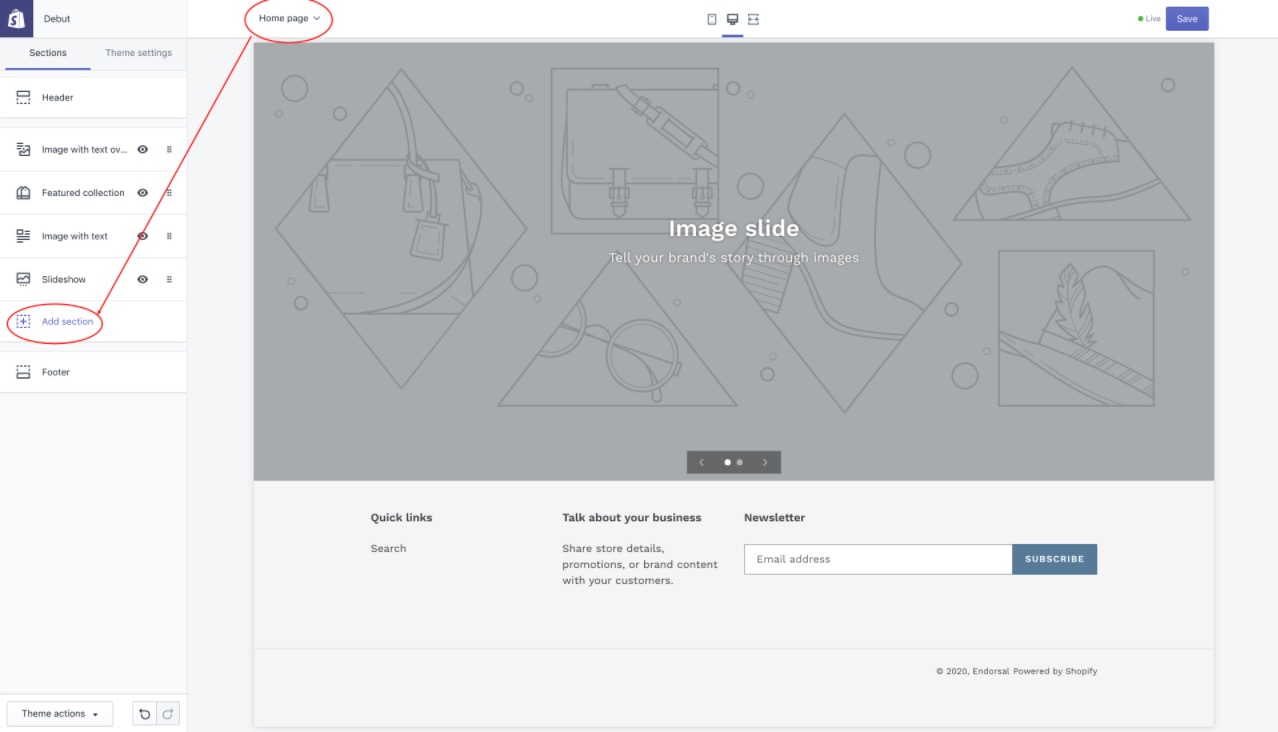
Select the page on which you'd like to add a widget from the menu at the top and then click "Add section" on the left menu:
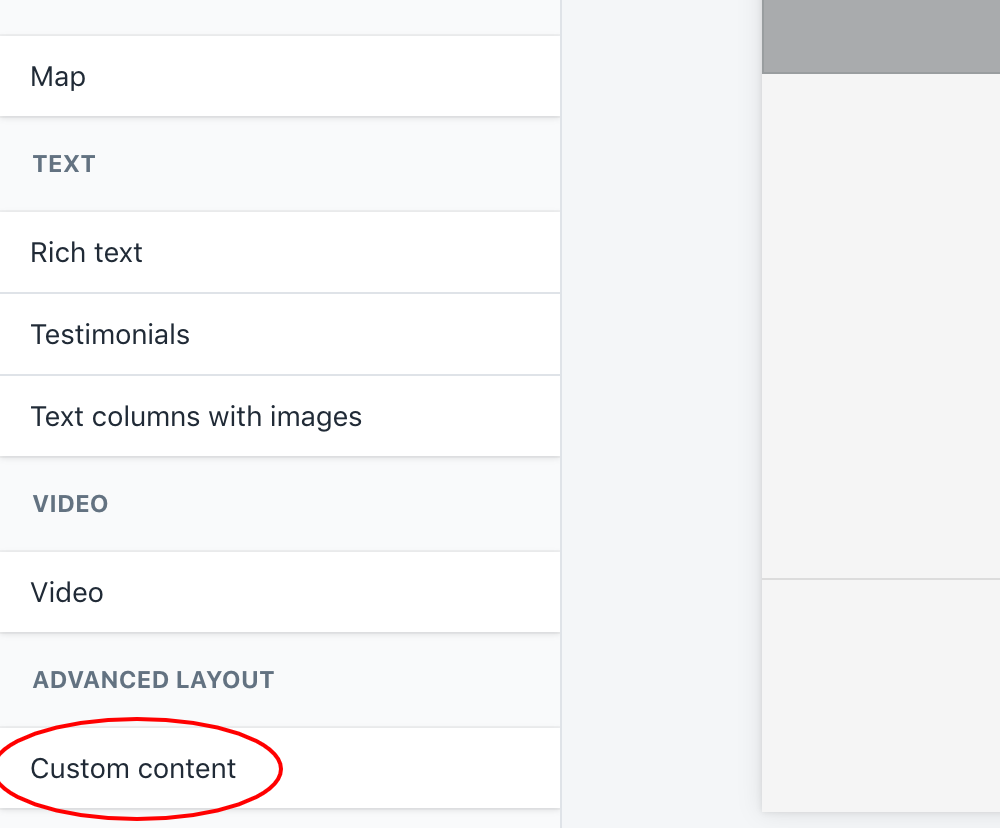
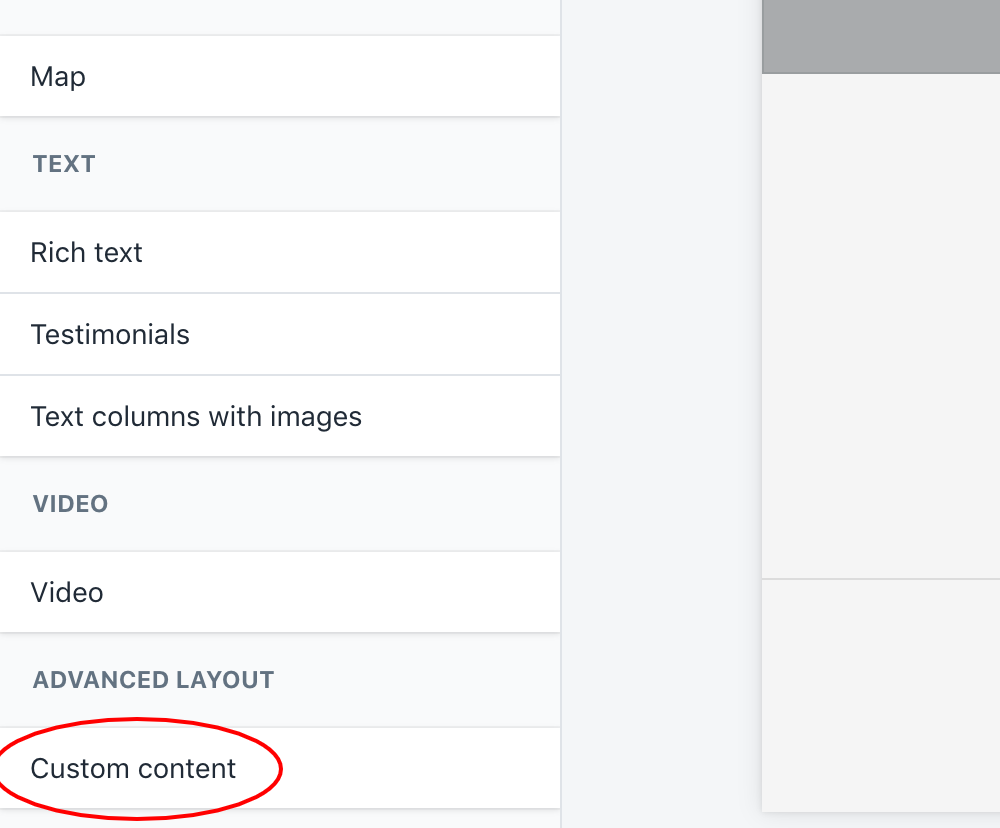
Scroll down to the bottom and select "Custom content", then click the "Add" button:
Remove any default content added, using the "Remove content" button. Then click "Add content":
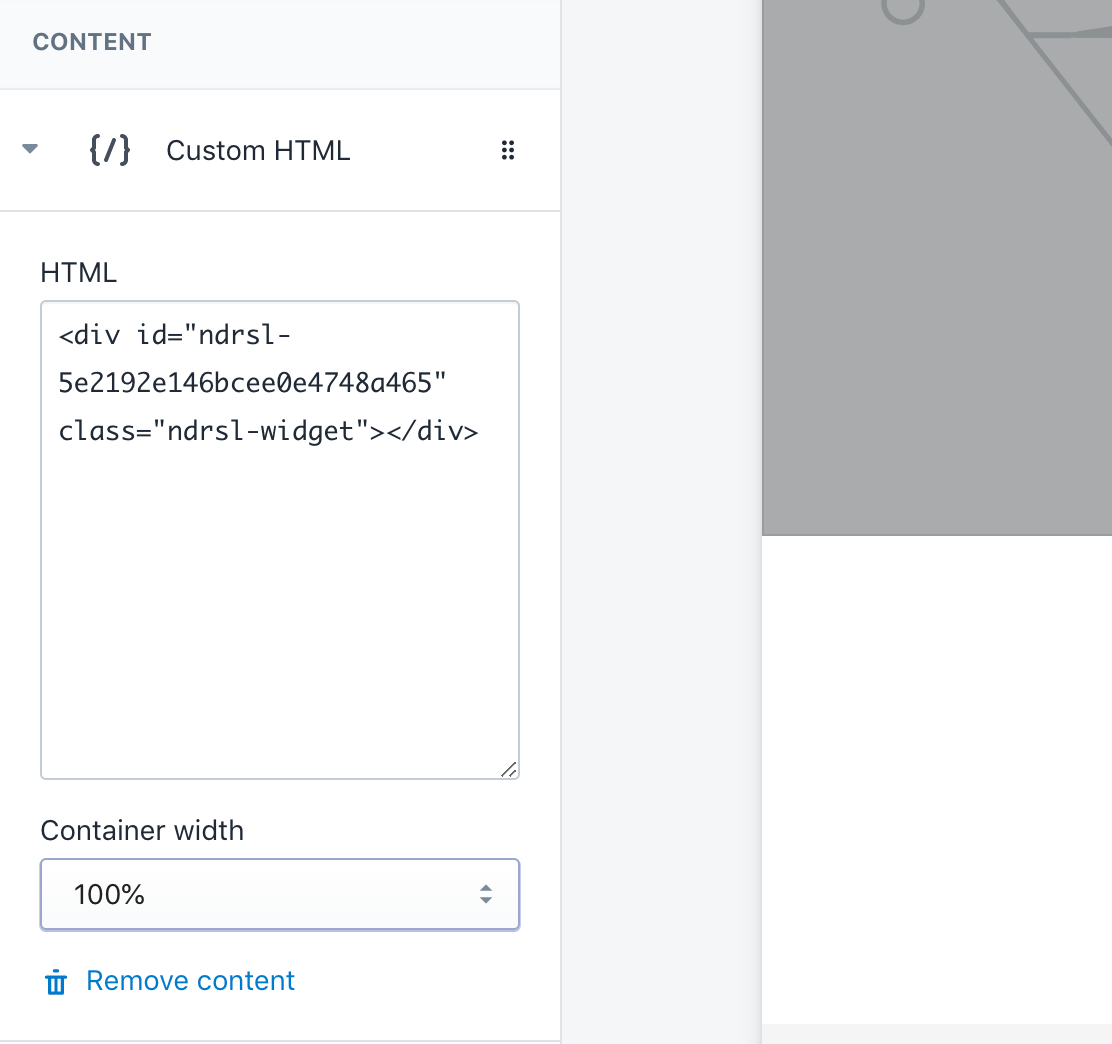
Select "Custom HTML" as the content type, paste in the Testimoni.es widget code in the "HTML" box and be sure to set "Container width" to 100%:
Once that's saved, refresh your site and as long as you have approved testimonials, your widgets will appear!


